Root Certificate Installation | |
Client Private Key and Certificate Installation |
In order for Internet Explorer 5, Outlook98 and Outlook Express 5 to be able to trust certificates issued by an Issuing Authority, it is necessary to install the Issuing Authority's Root Certificate into the system Registry. N.B. For Subscribers, this is most easily accomplished during the installation of the Client private key and certificate. However, for Relying Parties who will of course not be installing their own certificate, the following process may be used to install just the Issuing Authority's Root Certificate.
The following steps illustrate how an Issuing Authority's root certificate may be installed, using a fictitious example of an Issuing Authority called "Trustis Test Root CA".
If installing from a web page, just Right-Click
on the link that points to the Issuing Authority's Root certificate and choose "Save Target As ...", then choose a suitable place to store the root certificate file. Once stored, or If installing from a local or networked .p7b or .cer file, use Windows Explorer to locate the file, Right-Click on the root certificate file and choose "Install Certificate". The Certificate Manager Import Wizard starts. Click Next . |
|
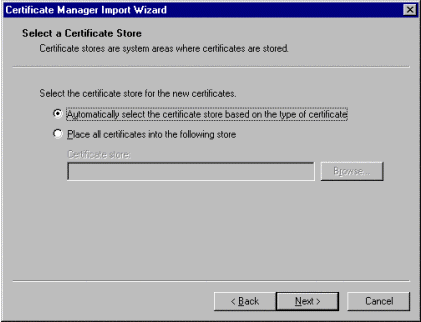
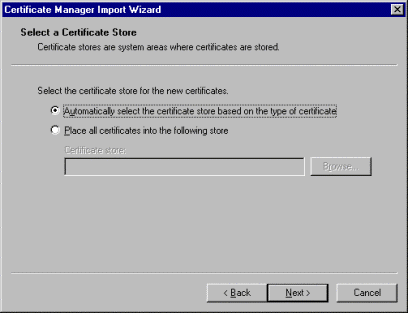
Choose the default setting of automatic
selection of the certificate store Click Next again. |
|
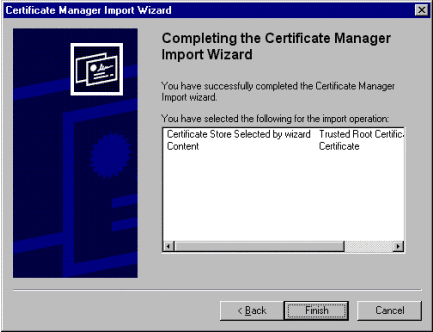
Click Finish | |
the Root Certificate Store message will appear |
|
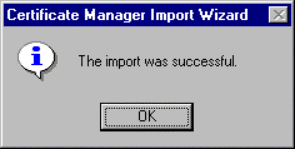
A dialog box like the one opposite will appear, confirming
success Click OK |
|
The Issuing Authority's Root Certificate is now installed. Client certificates issued by this Issuing Authority will now be trusted by Microsoft security-enabled applications, (provided they have not time-expired or have not been revoked). |
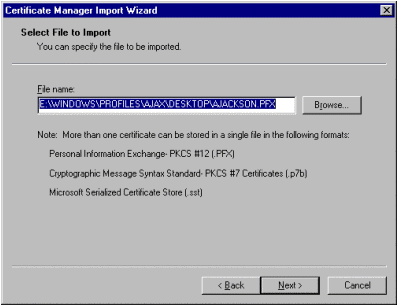
If installing from a web page, just click on the link that
points to the client certificate. If installing from a local or networked .pfx file, use Windows Explorer to locate the file, and double-click on the client .pfx file. In either case, the Certificate Manager Import Wizard starts Click Next |
|
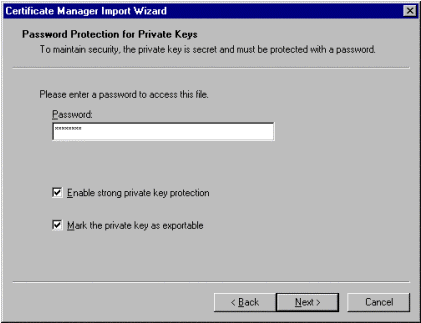
If installing from a file, click Next again | |
to reach the Password Protection for Private Keys dialog box and enter the transport password previously supplied to you. Select both options: Enable Strong Private Key Protection and Mark the private key as exportable. Click Next |
|
Accept the default setting of automatic selection of the certificate store and click Next again. | |
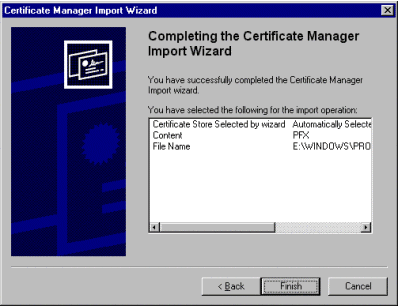
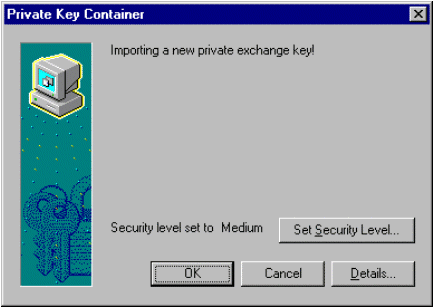
Click Finish and the Private Key Container dialog box appears | |
Click the Set Security Level button |
|
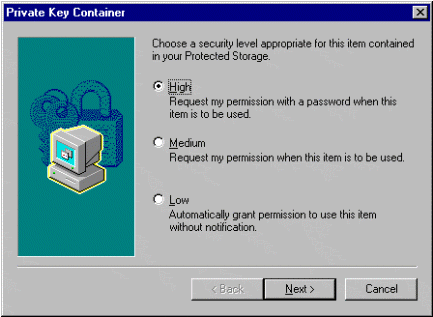
and select High in the next dialog box. Click Next |
|
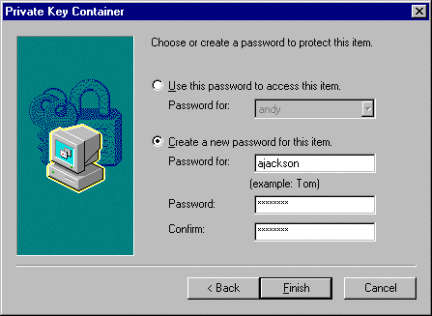
select Create a new password for this item. (This will be the password used to protect future accesses to your private key - see Private Key Protection for useful hints on choosing a password) Enter
a suitable name for this key container in the (Ignore any name in the Use this password to access this item box, this refers to any existing key container, if present.) |
|
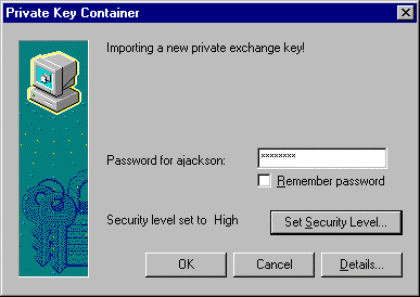
Click Finish and a further dialog box appears, Importing
a new private exchange key! Enter the new, user password you just created, do not enable Remember password. Click OK |
|
the Root Certificate Store message will appear |
|
finally, The import was successful will appear click OK |
|
The client private key and certificate and the Issuing Authority's Root Certificate are now installed and available for use by Internet Explorer 5 and either Outlook98 or Outlook Express 5 |
Copyright © Trustis Limited
2000-2003. All Rights Reserved
This document is licensed for use only in conjunction with the use of Trustis Trust
Services